Description
The ADDAC221 is a standard MIDI controller that allows CV inputs, converting CV variations to MIDI Control Change Messages. This allows interaction with your favourite standalone synthesizers and softwares through simple plug-and-play MIDI control.
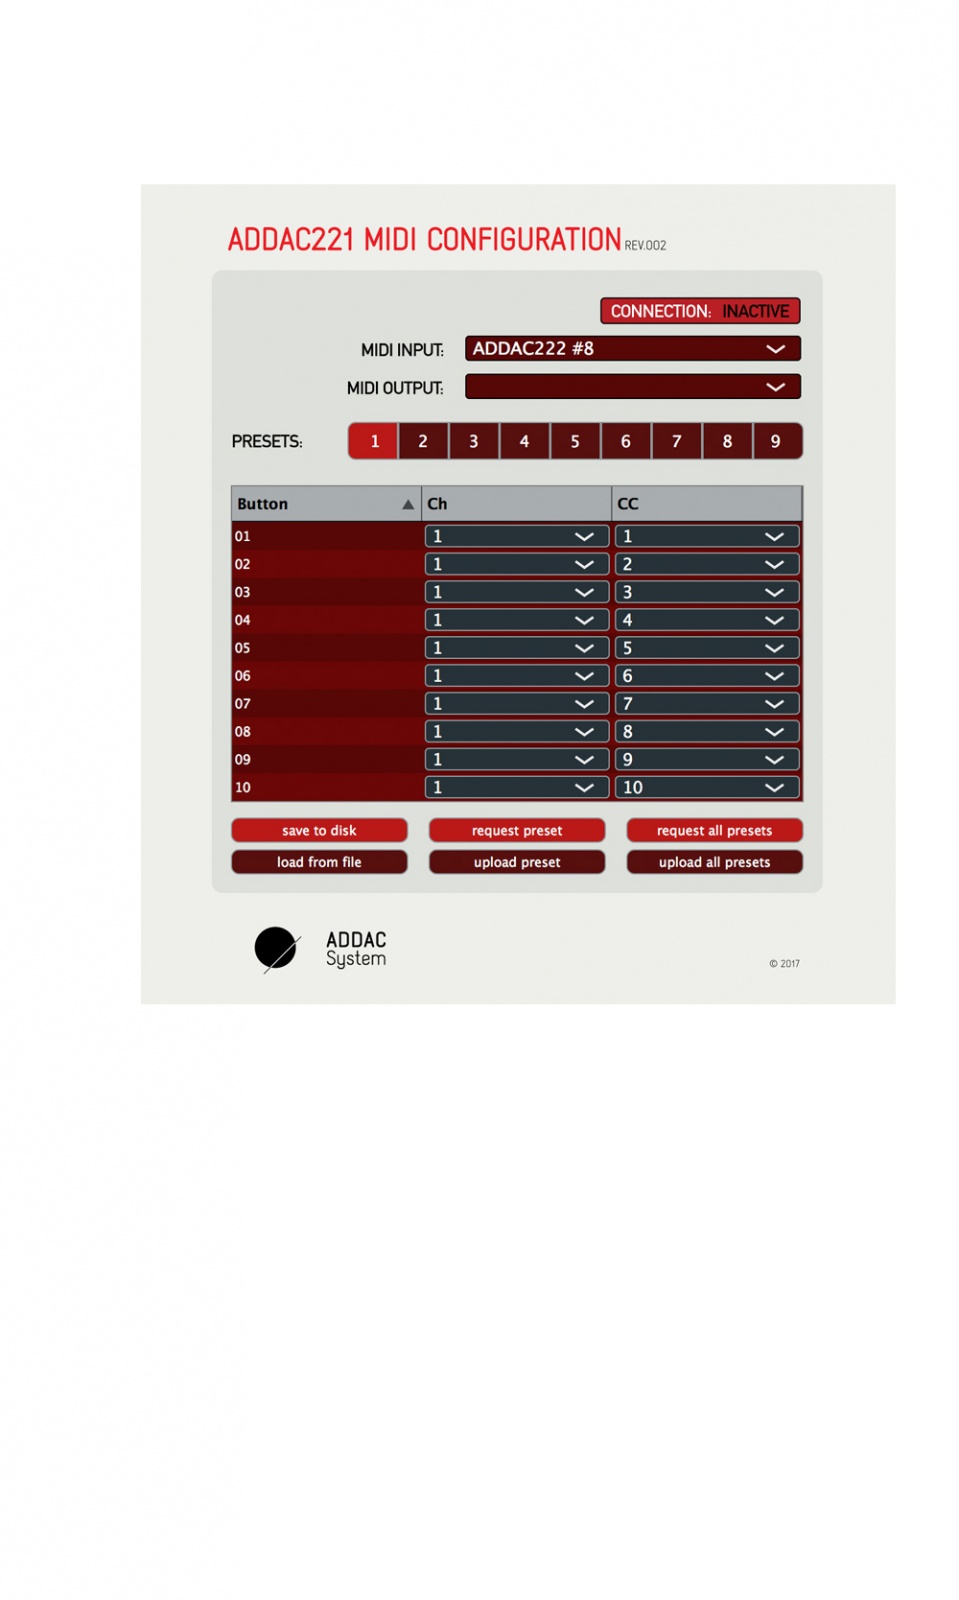
A dedicated software permits the user to store up to 8 different presets, where the CC values of each channel can be configured as wished.
This way the user can preset their favourite synths to control filters, envelopes and whatnot from CC messages coming from the module CV inputs.
Since September 2020, we had to change the number of presets to 8 due to lack of availability of 9 position rotary switches.
Features:
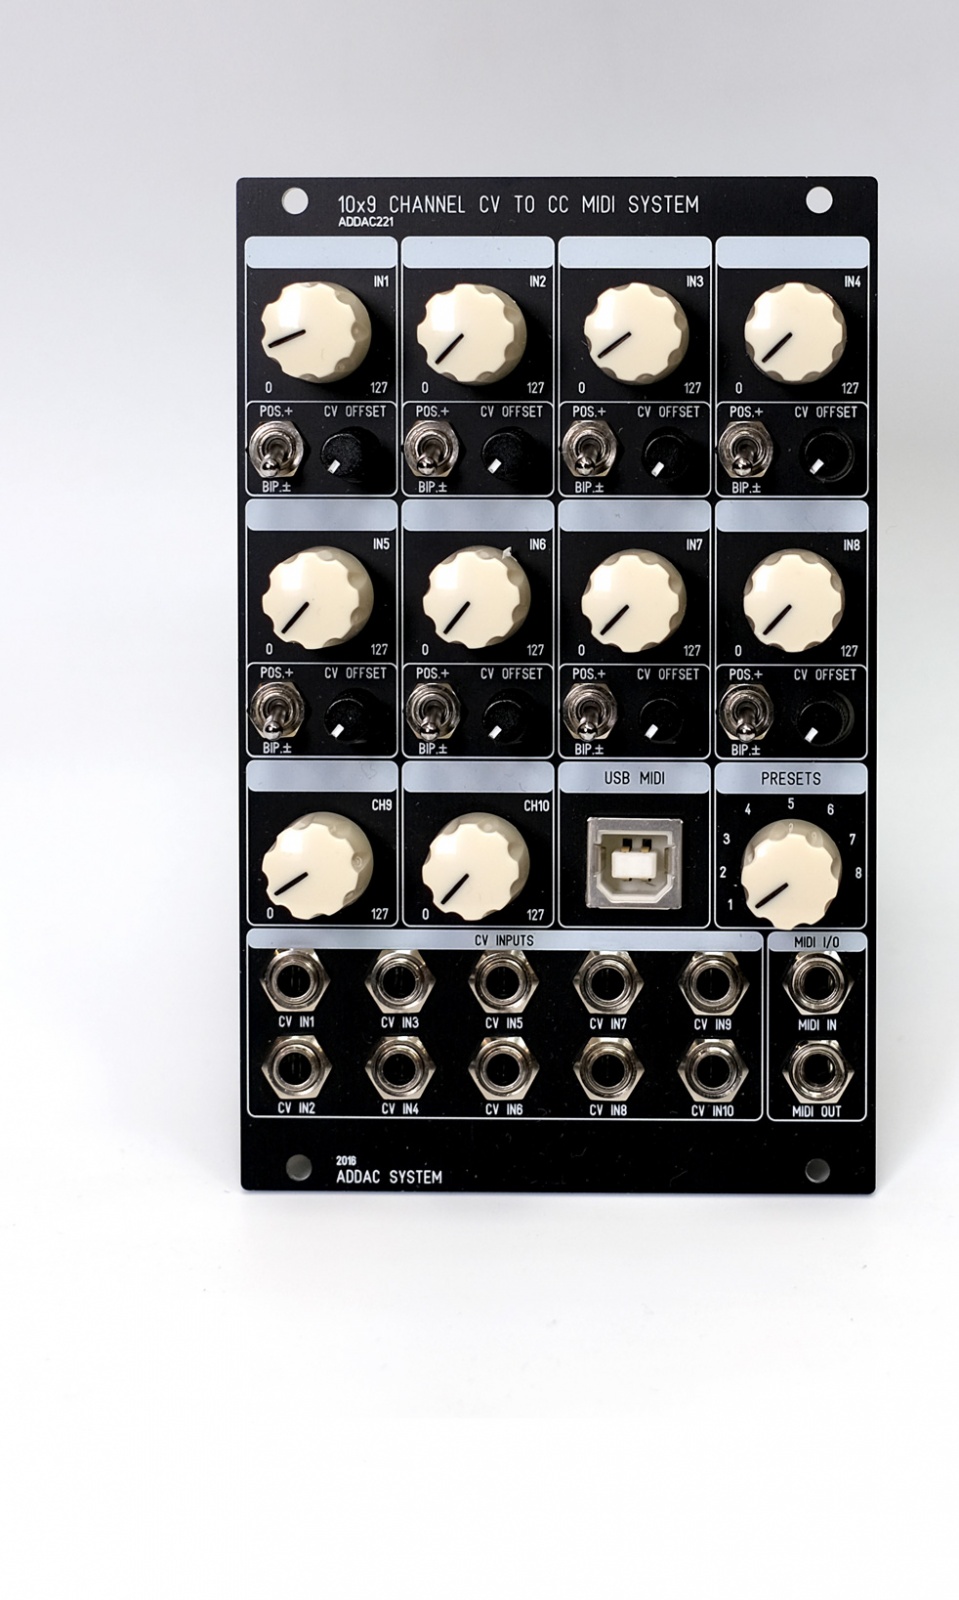
. It provides 10 MIDI channels with independent CV in. Each of the first 8 midi channels features a CV offset knob and a toggle switch to swap the received voltage from a bipolar to a positive signal.
. The CV OFFSET knob will define the midi out’s minimum possible value (0-127).
. MIDI data will be sent to two distinct outputs (USB MIDI and jack MIDI OUT).
. USB MIDI received data will be routed to the MIDI OUT jack.
. In turn, midi data externally sent to the MIDI IN jack will be routed both to the MIDI OUT jack and the USB MIDI port.
. This “thru function” allows to interconnect several ADDAC222 modules or just plug any external MIDI device through it.
Ships with 2 TRS to MIDI type A cables (Korg, Make Noise...).
Note: All specifications and features are subject to change without previous notice.
Custom Panel
In case you're wondering: Sure! We can get you a custom coloured front panel for the ADDAC221.
It has an additional cost and takes 4 to 6 weeks to be ready.
At the moment the ADDAC221 standard panel colour is Black.
A custom colour panel can be done in either Red, Green, Blue, White, Silver Gray, Yellowed Silver, and Dark or Light Bronze.
Print colour varies between Black, White, or Red, Yellow, Blue and Green. We recommend lighter-tone print for darker panels, and vice-versa.
Please note: we don’t stock custom coloured panels. For every custom order we need to make a single panel order from our panel provider. This explains the panel price and lead time.
Order
Thanks for your interest in the ADDAC221!
To proceed with a direct purchase, you may fill out the form on our Orders Page.
If you want to obtain it through a shop closer to you, this is our Distributors Page.
FAQ
Can you send CV>CC to different channels at the same time in the same preset?
There’s an App where you can program each preset of the module, for each of the module's input channel (1 to 10) you can set a cc number and the midi channel.
So yes, independent MIDI channels for each input.
Can this be used to send triggers as well?
Yes, MIDI triggers are simply CC commands with 0 or 127 values, so just send a gate to it assign the cc to the trigger you want to control.
I’ve looked literally everywhere, and nowhere does it say what the white knobs for each input of this module do. Eight channels have a VC offset knob which determines the minimum CC value, but what do the big white knobs do?
The white knobs are manual controls that also act as offsets to the incoming cv input.
The small pots are the attenuators for the cv inputs, so with the combination of these two you can scale and offset any cv input to any MIDI range.
If you use only positive cv inputs then the big knob will actually control the minimum MIDI cc value and the small attenuator knob will determine the maximum value.
Download Config App
Download Application Guide:
http://media.addacsystem.com/apps/ADDAC221_Guide.pdf
Download Application
OSX:
http://media.addacsystem.com/apps/ADDAC221_OSX.zip
Windows:
http://media.addacsystem.com/apps/ADDAC221_Win.zip
Firmware Update
Here's the procedure for updating your ADDAC221 Firmware
First you need to download this App:
https://www.pjrc.com/teensy/loader.html
Next download and unpack the Firmware file:
http://media.addacsystem.com/firmwares/ADDAC221_Firmware.zip
Open the App, go to: File>Open HEX File and choose the .hex file downloaded.
Take your module out from the frame but keep it connected to your modular and keep power ON.
Also plug the usb cable to your computer and the ADDAC221 front panel USB port.
Then look between the 2 pcbs of the module and there’s a smaller board in between, at the top of that small board you can find a small white push button, use some plastic tool (metal may short some pins when reaching in) to reach in and press the button once.
Now hit upload on the teensy loader app and you're all done.
----------------------------------------------------------------------------------------------
Last update version: B_6, May, 30th, 2017